|
This recipe was yet another one that I found when I was innocently browsing Pinterest. I honestly wasn't even sure I would like it, I tend to avoid spicy foods, and since it was an Indian dish I was afraid it would be spicy. But nothing sounded too intimidating on the list of ingredients, so I thought I would go ahead and give it a shot. If you want to try this recipe too, you can find it by clicking here, or going to my Pinterest "recipes" board. This recipe is from the blog called Slow Cooker Gourmet. 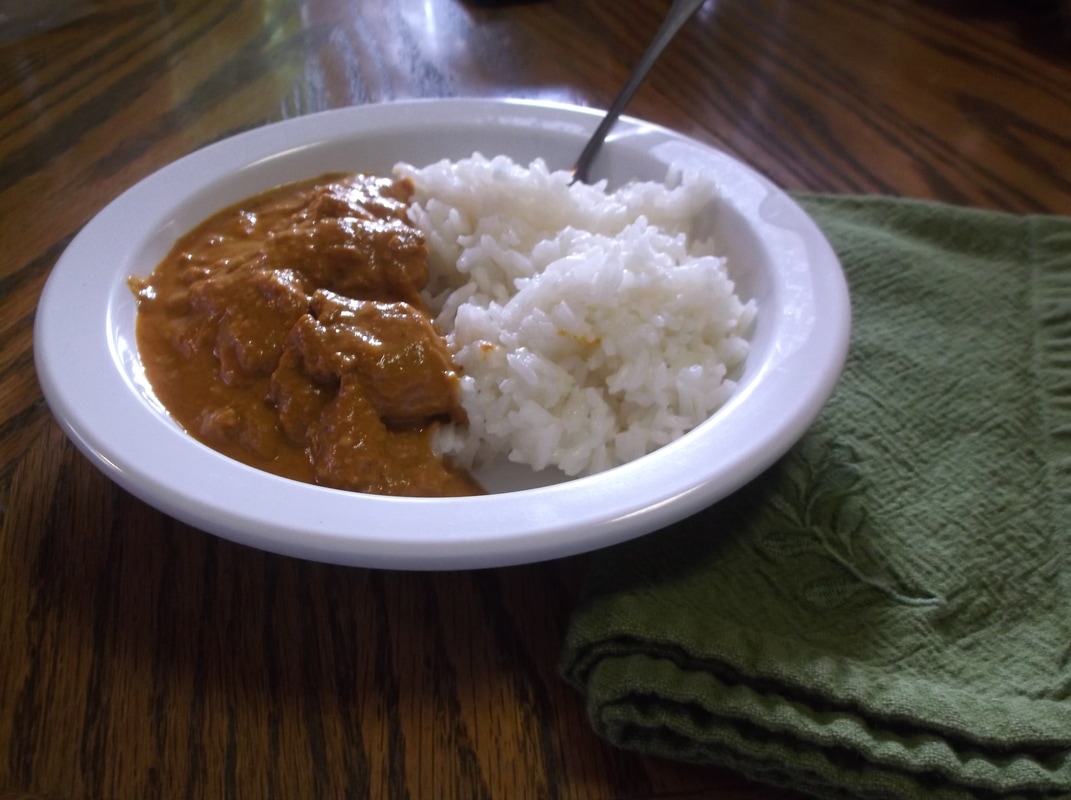 So, this recipe was super simple, I just cut up two pounds of boneless, skinless chicken breast and added the rest of the ingredients (spices, curry paste, coconut milk, tomato paste, etc.) and left it all in the crock pot on a low setting for about 8 hours! The end result was different than I expected, but very good. The very first time I had it, my nose ran for a couple of minutes after I finished eating, and I wonder if it was because of the spices. But it didn't taste spicy at all, there was absolutely no burning sensation in my mouth was I was eating the dish. I think my sinuses just needed to get used to the new spices in the dish! :) The chicken had a very thick sauce around it, and a very, well, buttery taste to it! It can lay a bit heavy on your stomach, and the first couple of times I ate it I needed to wash it down by drinking lots of water and milk. Not because of the spices, but because of the density of the entire dish! Eating rice with it helps with the denseness immensely. Overall, I give this recipe a 4 out of 5. It is very good, and very easy to make, but it can sit very heavy on your stomach, and it tastes "interesting" if you aren't used to the spices that are used in the dish. Honestly, I will definitely be making this recipe again, but maybe not too soon. :) Don't be afraid to be creative, Nicole 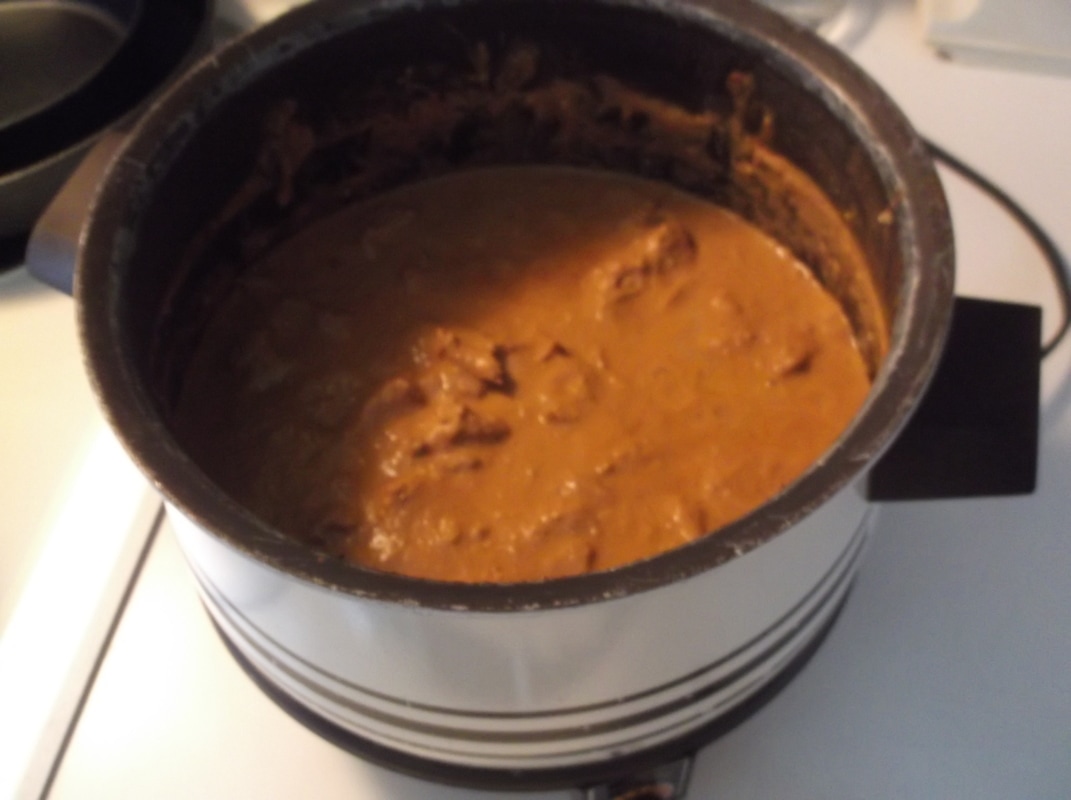
0 Comments
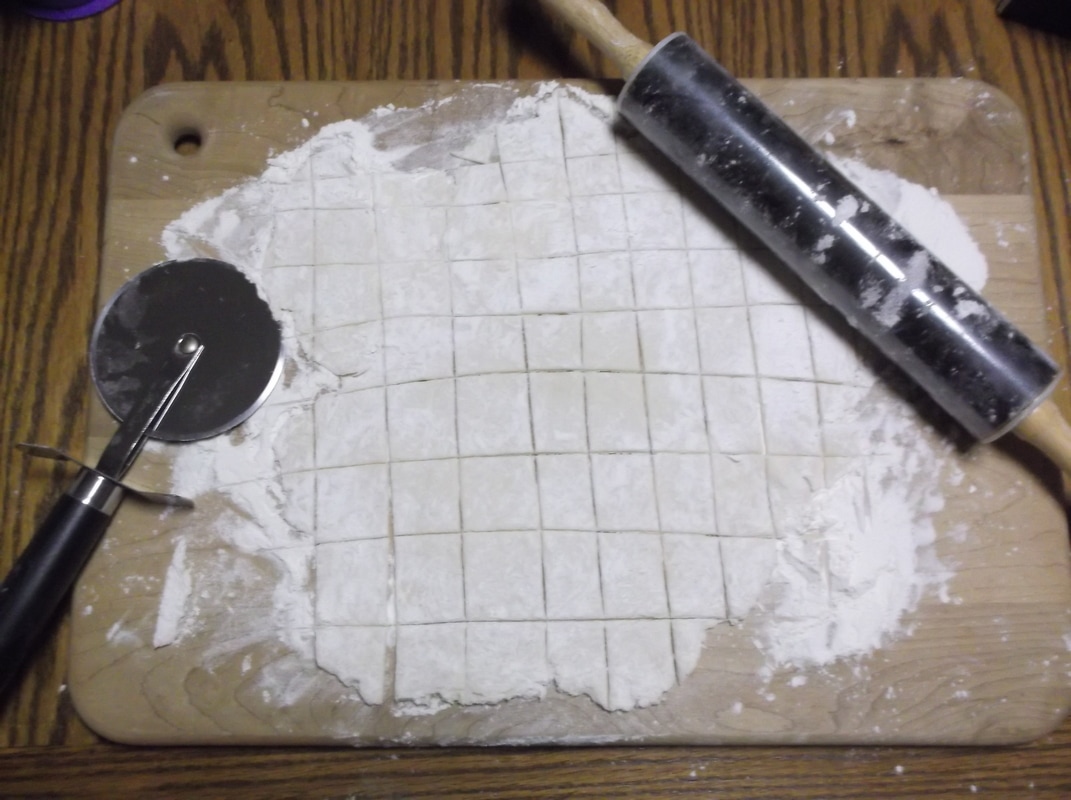
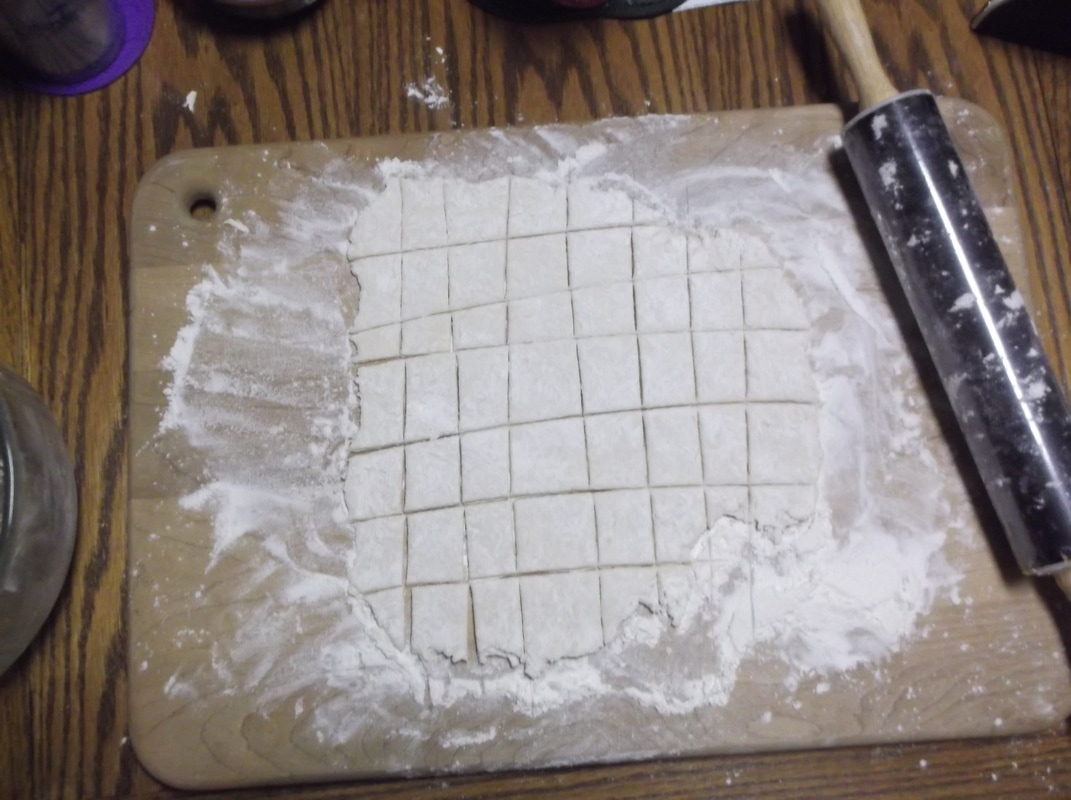
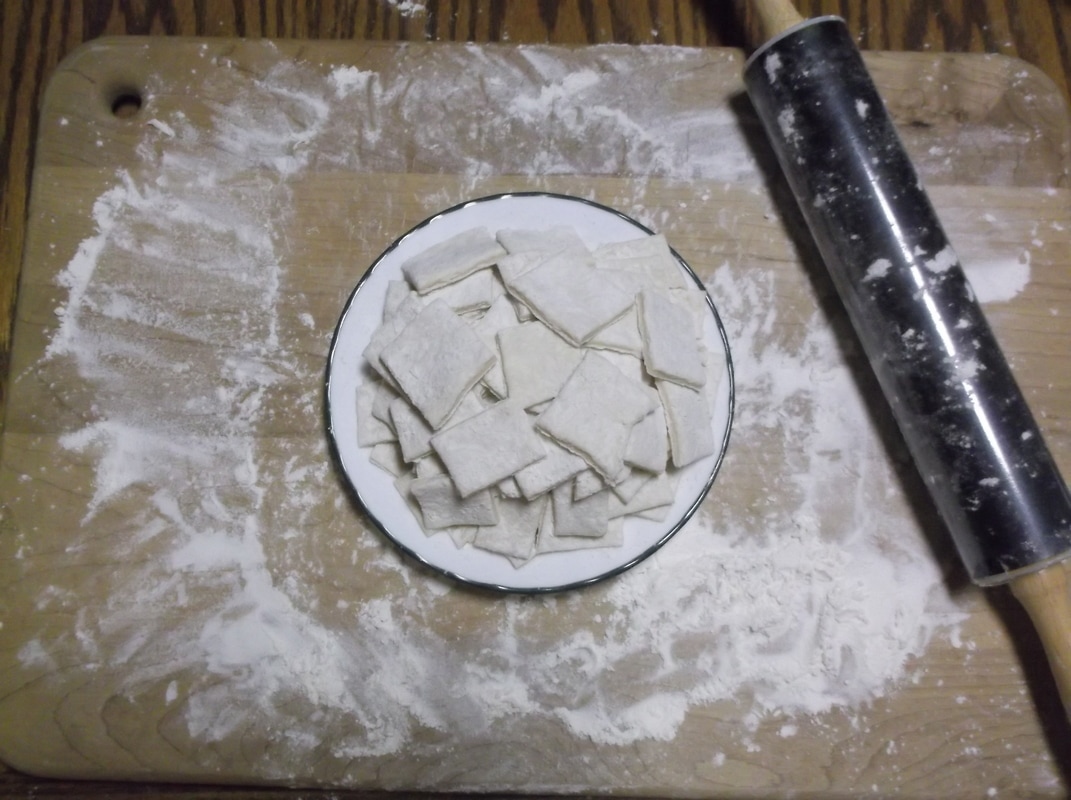
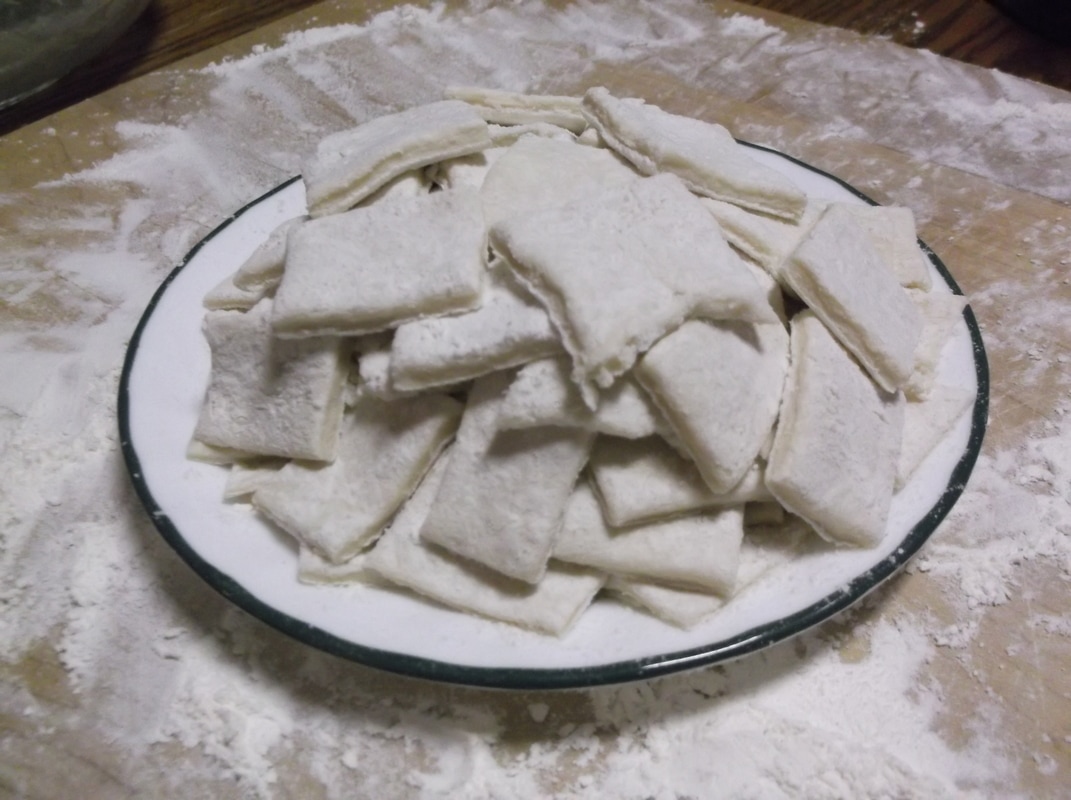
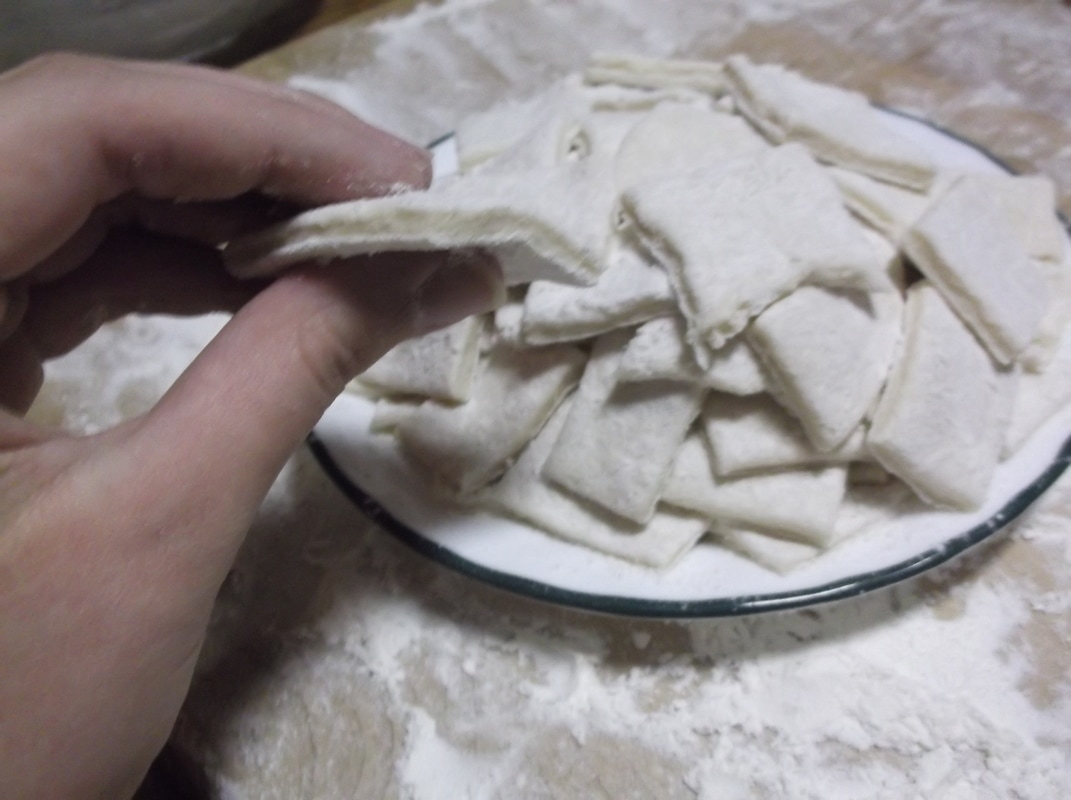
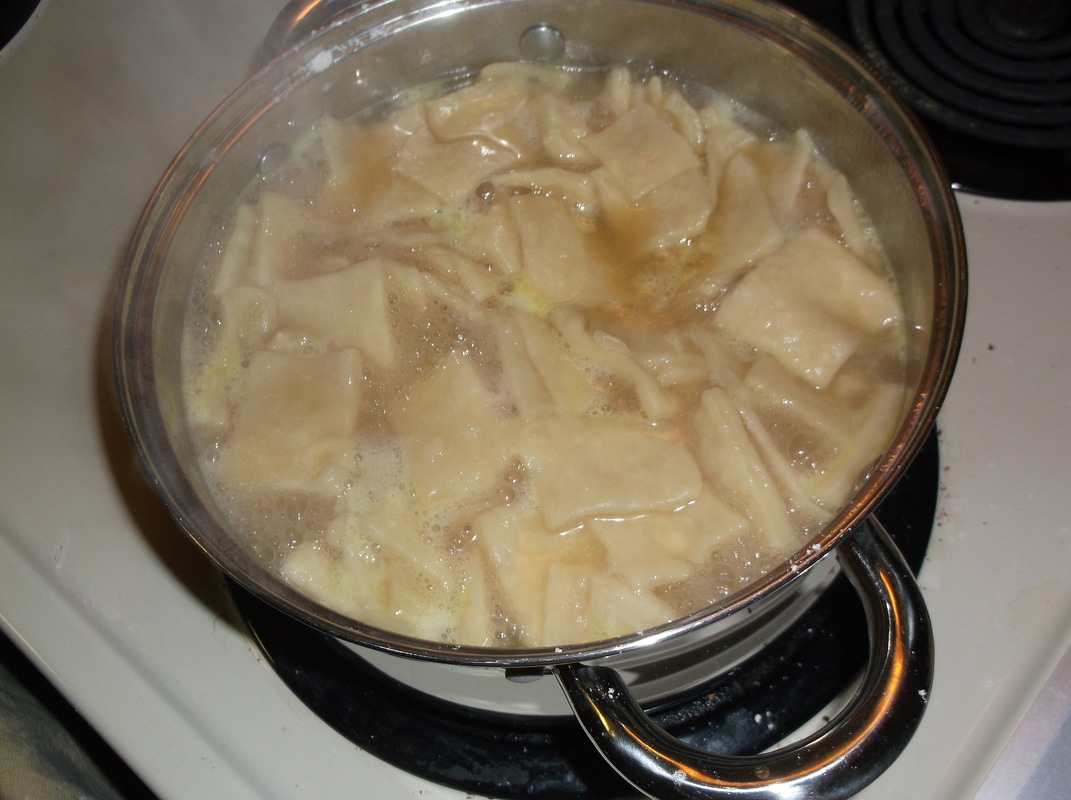
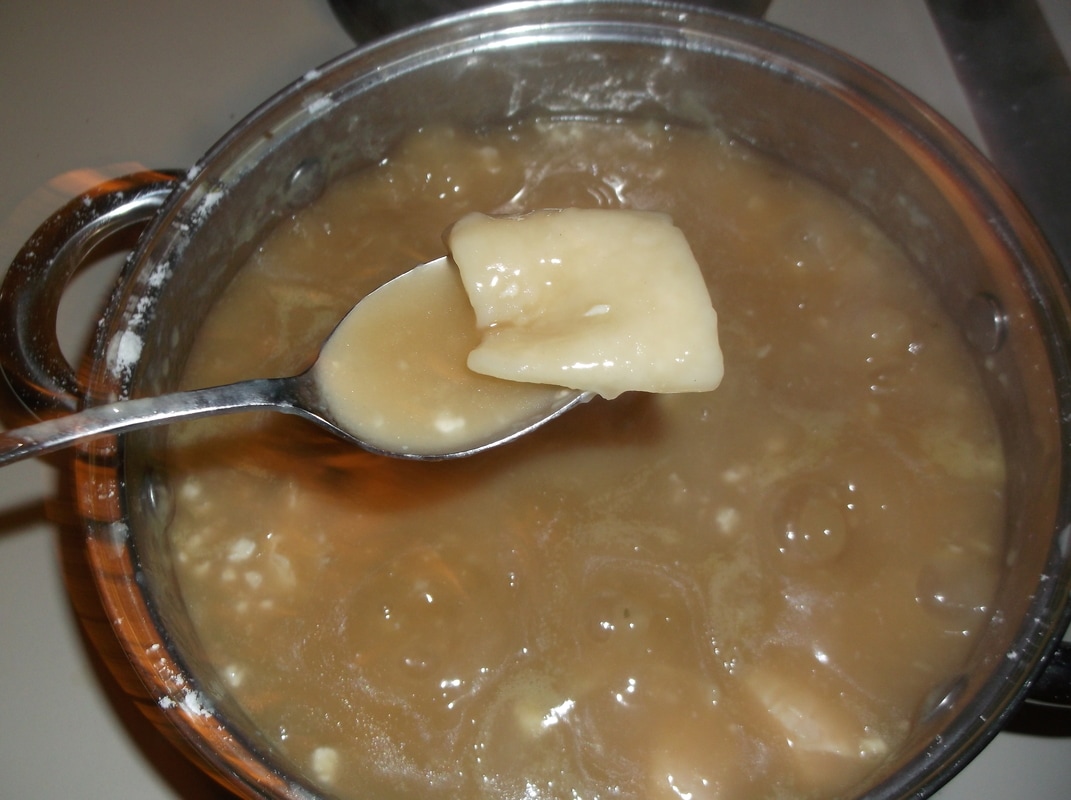
It all started one day when I was at my job on the campus of my university, thinking about the International Dinner that was coming up, hosted by the Global Student Association at the university. As I was going about my daily office duties, I was thinking about all the scrumptious global dishes I would get to sample on the evening of the anticipated event, and it got me thinking. What kinds of American foods would people from other countries want to try? The famous burger and fries? A Philly cheesesteak? Deep-dish, Chicago-style pizza? Then, it hit me: southern-style chicken and dumplings. Immediately my already-hungry mind gravitated to the thought of tender chicken and plump dumplings, smothered in a gravy-like broth, served in a bowl over warm, creamy mashed potatoes. The thought was torturous, especially since I wouldn't be leaving work for another two hours, and even then I would be stuck eating campus food... again. I was really beginning to miss home-cooked meals. I retreated straight to Google, and a few seconds later I was bombarded with hundreds of recipes claiming to be the "best chicken 'n dumplins recipe". I looked at the pictures of the first few recipes that popped up, and the one that looked the best to me at the moment was one from a blog called Iowa Girl Eats. You can find the recipe here, and I think Kristin's (the author of Iowa Girl Eats) recipe is wonderful! I'll include a quick picture of my finished dish before I dive into what I did. 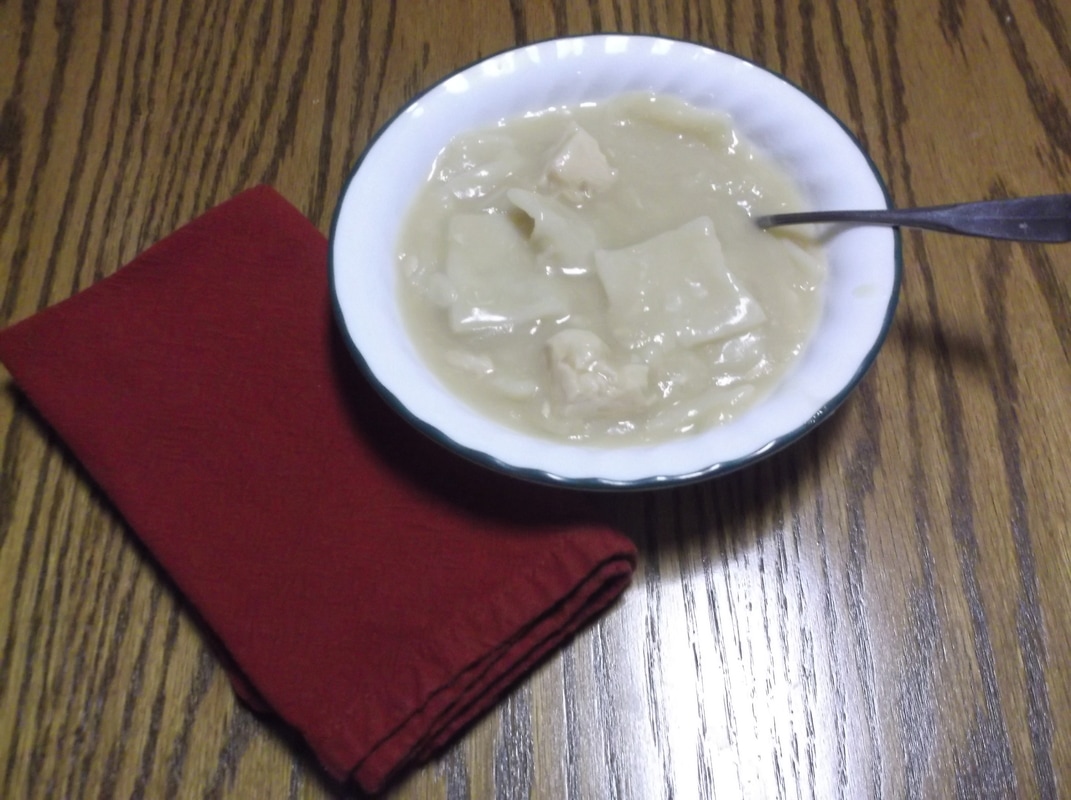 Doesn't it look FABULOUS?!? Alright, first of all, I did NOT fully follow the recipe. The recipe includes instructions for cooking the whole chicken and making a broth, but I did not have the time for all that because I had homework to do. It was the weekend after I had discovered the recipe online, so I still had some more important things to do on my list. :) I started out making the dumplings. The dough recipe was really simple, and I think making dumplings is even easier than making homemade noodles! I just mixed up the dough, rolled it out to maybe 1/4 inch thickness. You don't have to be super precise with rolling the dough out, just make it as thin or as thick as you want your finished dumplings to be. I made sure to use PLENTY of flour, because the dough can get very sticky. The flour will also help thicken up the broth later on when you are cooking the dumplings. That is what makes the broth more gravy-like. I just rolled out the dough, cut it into bite-sized pieces with a pizza cutter, and piled them on a plate to be kept handy when I start putting them in the broth. Next, I started making the broth. Since I didn't cook the whole chicken, I used a can of white meat chicken and pulled together a pretty flavorful broth from some things I found in the cupboard. A carton of chicken stock and a few cups of water with some Amish chicken soup base did the trick. 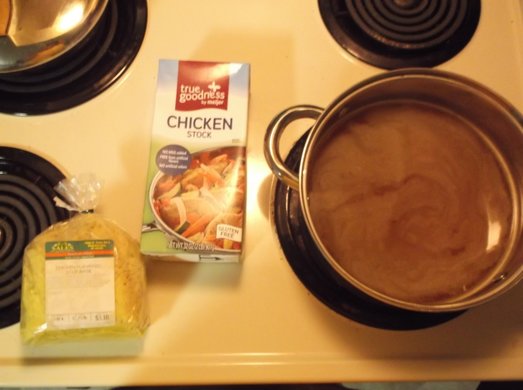 Note: I'm not endorsing or advertising any brand of chicken broth/stock, canned chicken, or anything else, these products are just the ones I happened to have on hand in the kitchen. 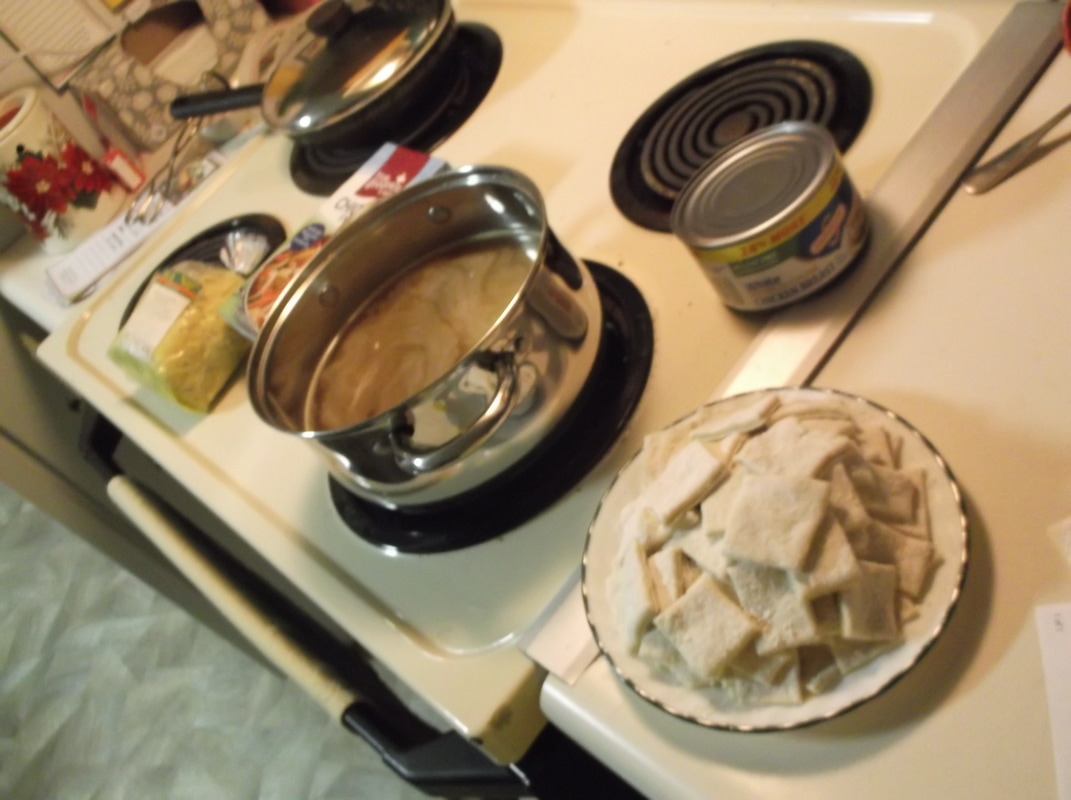 Once I got enough broth heated up, I started dropping the dumplings in one by one, just like the recipe said. I was surprised because the raw dumplings were very doughy and fragile, but shortly after they started boiling they got rigid, and weren't tender anymore. Then I had to boil them for 15-30 minutes or so until they became fully-cooked and tender. It was so hard to wait until they were done cooking, because I was so hungry and I had been looking forward to dumplings for a while! After the dumplings were mostly cooked, I added the canned chicken to let it warm up. At first I was worried there wouldn't be enough broth to balance out the chicken and dumplings, but it worked out in the end. The final product was just wonderful, and I know it would have been even better if I had been able to follow the recipe and make the chicken broth from scratch. Overall, I give this recipe a 5 out of 5 stars, and I will definitely be using it again! It has made a spot in my recipe box along with my other most favorite and most used recipes. :) 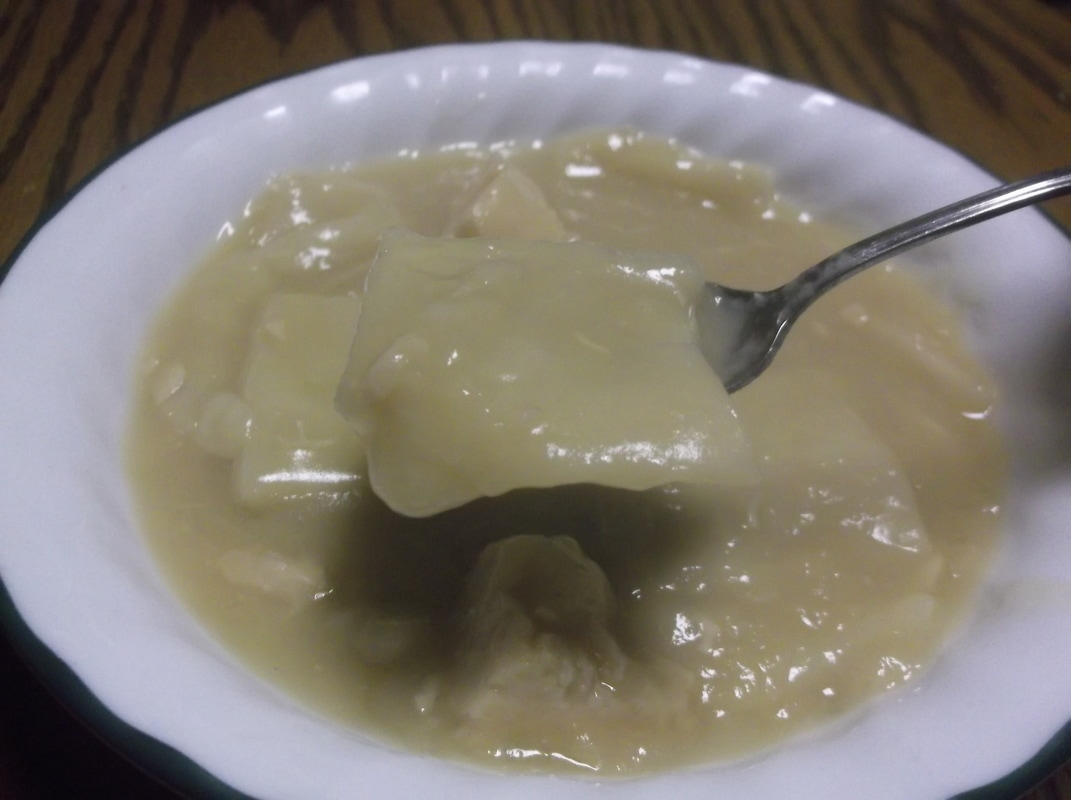 Don't be afraid to be creative,
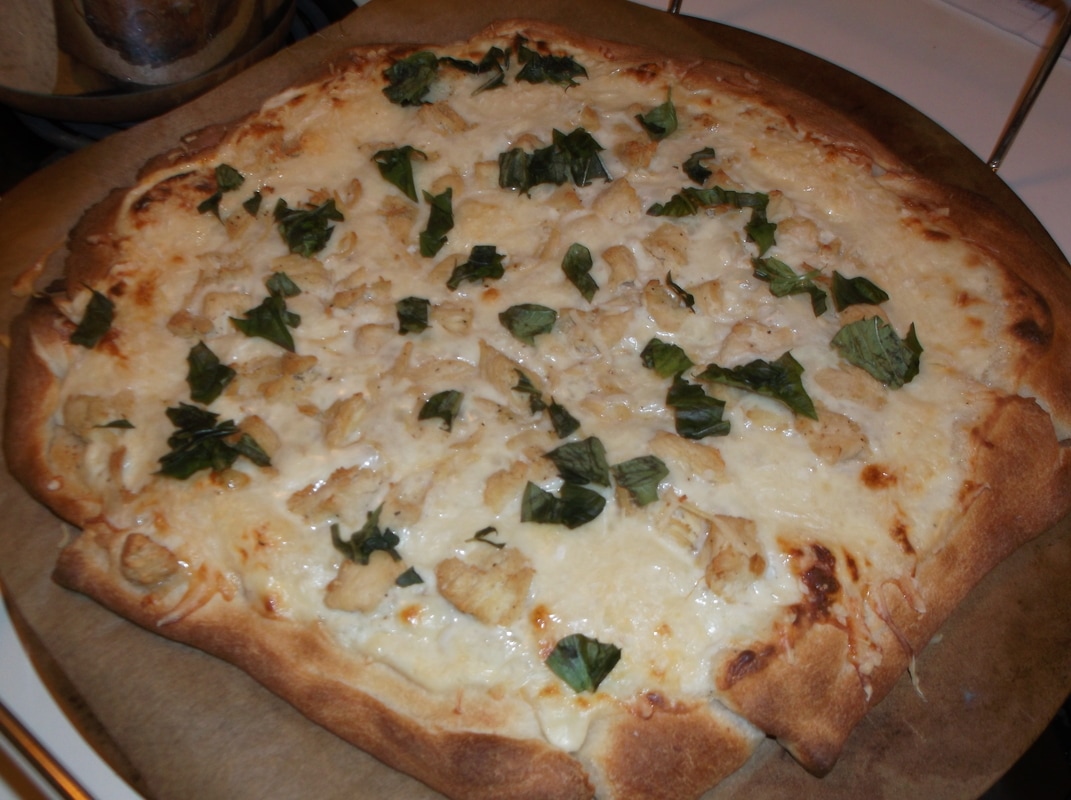
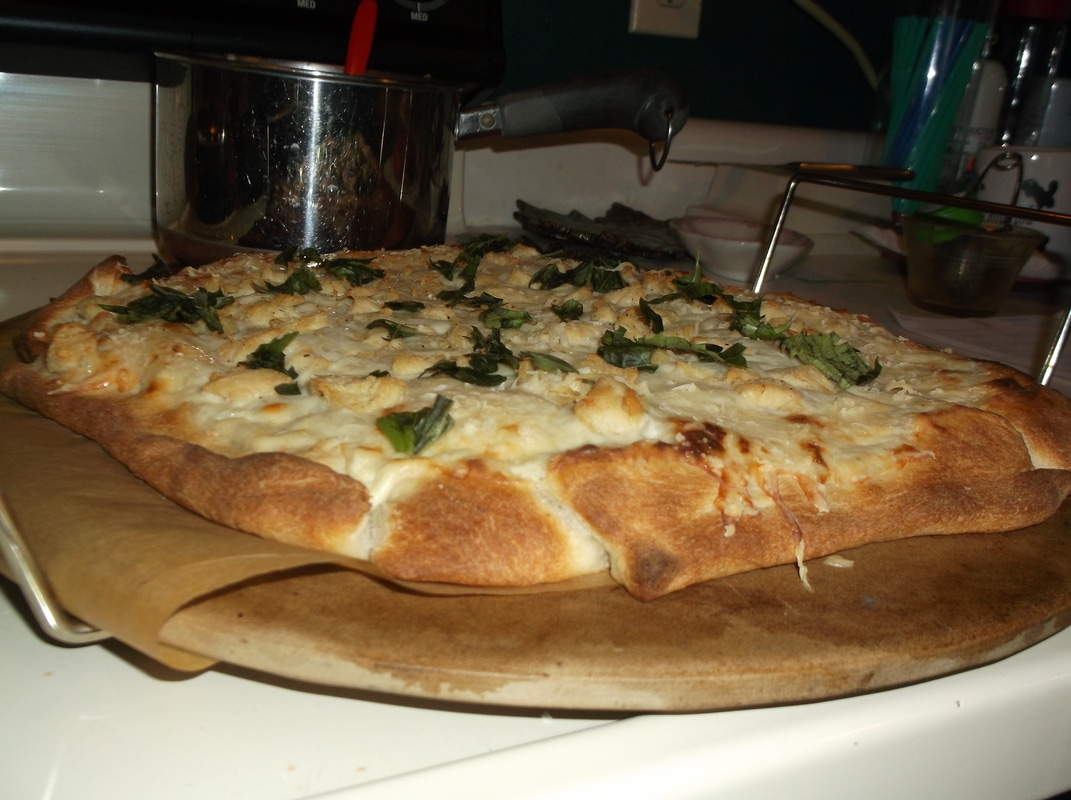
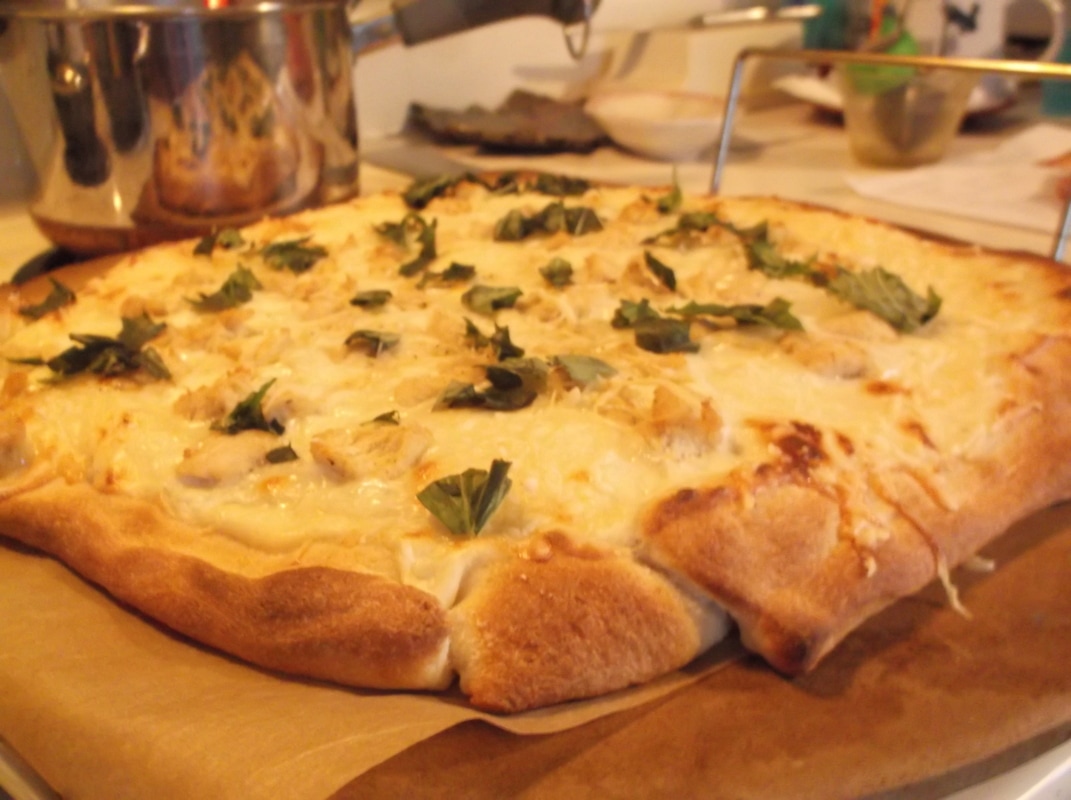
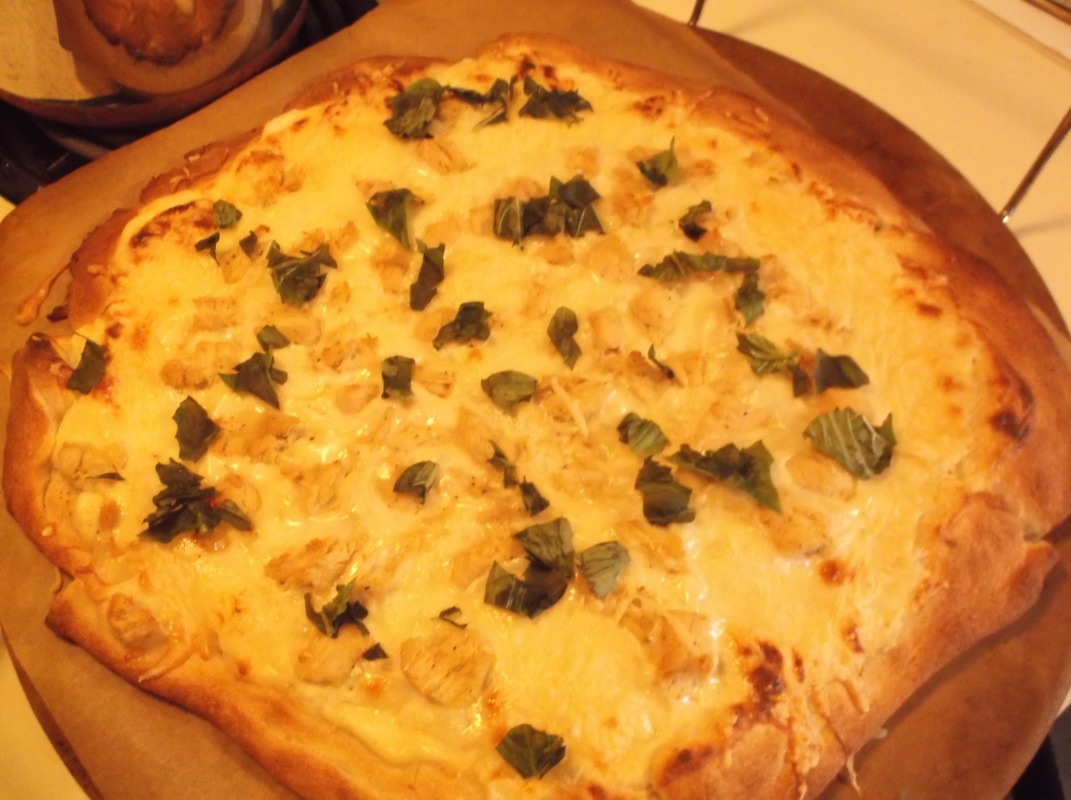
Nicole So, today my good friend and I made the most AMAZING pizza, following a wonderful recipe that I found on pinterest a while ago! (Click my pinterest button at the top of this website, and you'll see all my boards, full of things I think are absolutely cool, like this recipe!) By the way, in case you were wondering, this recipe is from The Marvelous Misadventures of a Foodie blog, and you can see this recipe on that website by clicking here. On a scale of 1 to 5, with 5 being the most heavenly thing I've ever tasted, I would give this recipe a 5 and 1/2! It was so tasty, the recipe was pretty easy to follow, and it used pretty normal, keep-on-hand ingredients. It didn't even take that long to whip up the homemade alfredo sauce! This is one of the few internet recipes I've tried that actually turned out just as beautiful and delicious as I expected, and it was pretty easy too! The alfredo sauce used in the recipe would also be wonderful on pasta, so I'm keeping this recipe on hand for that purpose as well. *I love pasta soooo much* Me and my friend agreed that this pizza contains all things good and necessary in the kitchen: garlic, alfredo sauce, chicken, basil, and mozarella cheese. What more could you ask for?! The dough we used was Pillsbury, pre-made in a can. I think it was supposed to be rectangular, but it got a bit traumatized when I was trying to take it out of the can and unroll it, so I reshaped it into a more round-ish shape. When we had made the alfredo sauce, we put that on the dough, then put mozarella cheese and cooked, shredded chicken on it. We didn't measure how much chicken we used, but I'm sure it wasn't the full 1 and 1/2 cups suggested in the recipe. Then we baked it for about 14 minutes. The crust was getting close to getting too brown, but we wanted to make sure the middle was completely cooked. Right when we pulled it out of the oven, we sprinkled the basil on it. (By the way, we tore the basil gently with our hands instead of cutting it. We just think it worked better that way.) Then we let our lovely pizza creation cool for a couple minutes. I think those minutes helped the basil warm up with the pizza and release some of its flavor. I'm thankful we got pictures of it when we did, because it honestly didn't stick around too long after these pics were taken. :) As I end this post, I apologize for the lighting in the pictures of the pizza. I wasn't completely happy with the flash on, or with it off, so I included the pictures taken with both. Hopefully between the two different light settings you can get an idea of how truly beautiful this pizza was. :) |
AuthorI am a college student who loves being creative and resourceful. I have passions for knitting, subsistence farming, Scripture memory, and anything creative! I hope this blog will prove to be a good creative outlet for me, and inspiring for you! Archives
May 2017
Categories |

 RSS Feed
